Showing posts with label cushion. Show all posts

Tuesday, 22 October 2013

Flower Power cushion cover workshop

When I was looking at the Knitting and Stitching Show website, I saw there were lots of workshops we could do - between an hour and two hours long, and for a really reasonable price!  We took the opportunity to make the 'Flower Power cushion cover' - for the very reasonable price of £10, it seemed like a bargain opportunity to learn a little more about using our sewing machines and making something pretty for the house!


Using the needle threader

Yes I know - ten months of sewing and I still didn't know how to use my needle threader!  I should be ashamed!  Obviously I could have checked online but I could thread it myself (usually!) so I never quite got round to it.  Wendy, our tutor, was on hand though to show us how.  Surprise surprise, it's very simple, and now it'll save me precious seconds at home when I go to thread my machine!

Appliqué

My previous cushion was my first go at appliqué, so it was great to have another try under some guidance.  I chose dark thread to go over my flowers - just to show off any mistakes, of course - so I had to be extra careful.  The bottom flower was a bit of a fiasco, but fortunately I covered it over with the second one so the overall effect was pretty pleasing!


Envelope back cushion

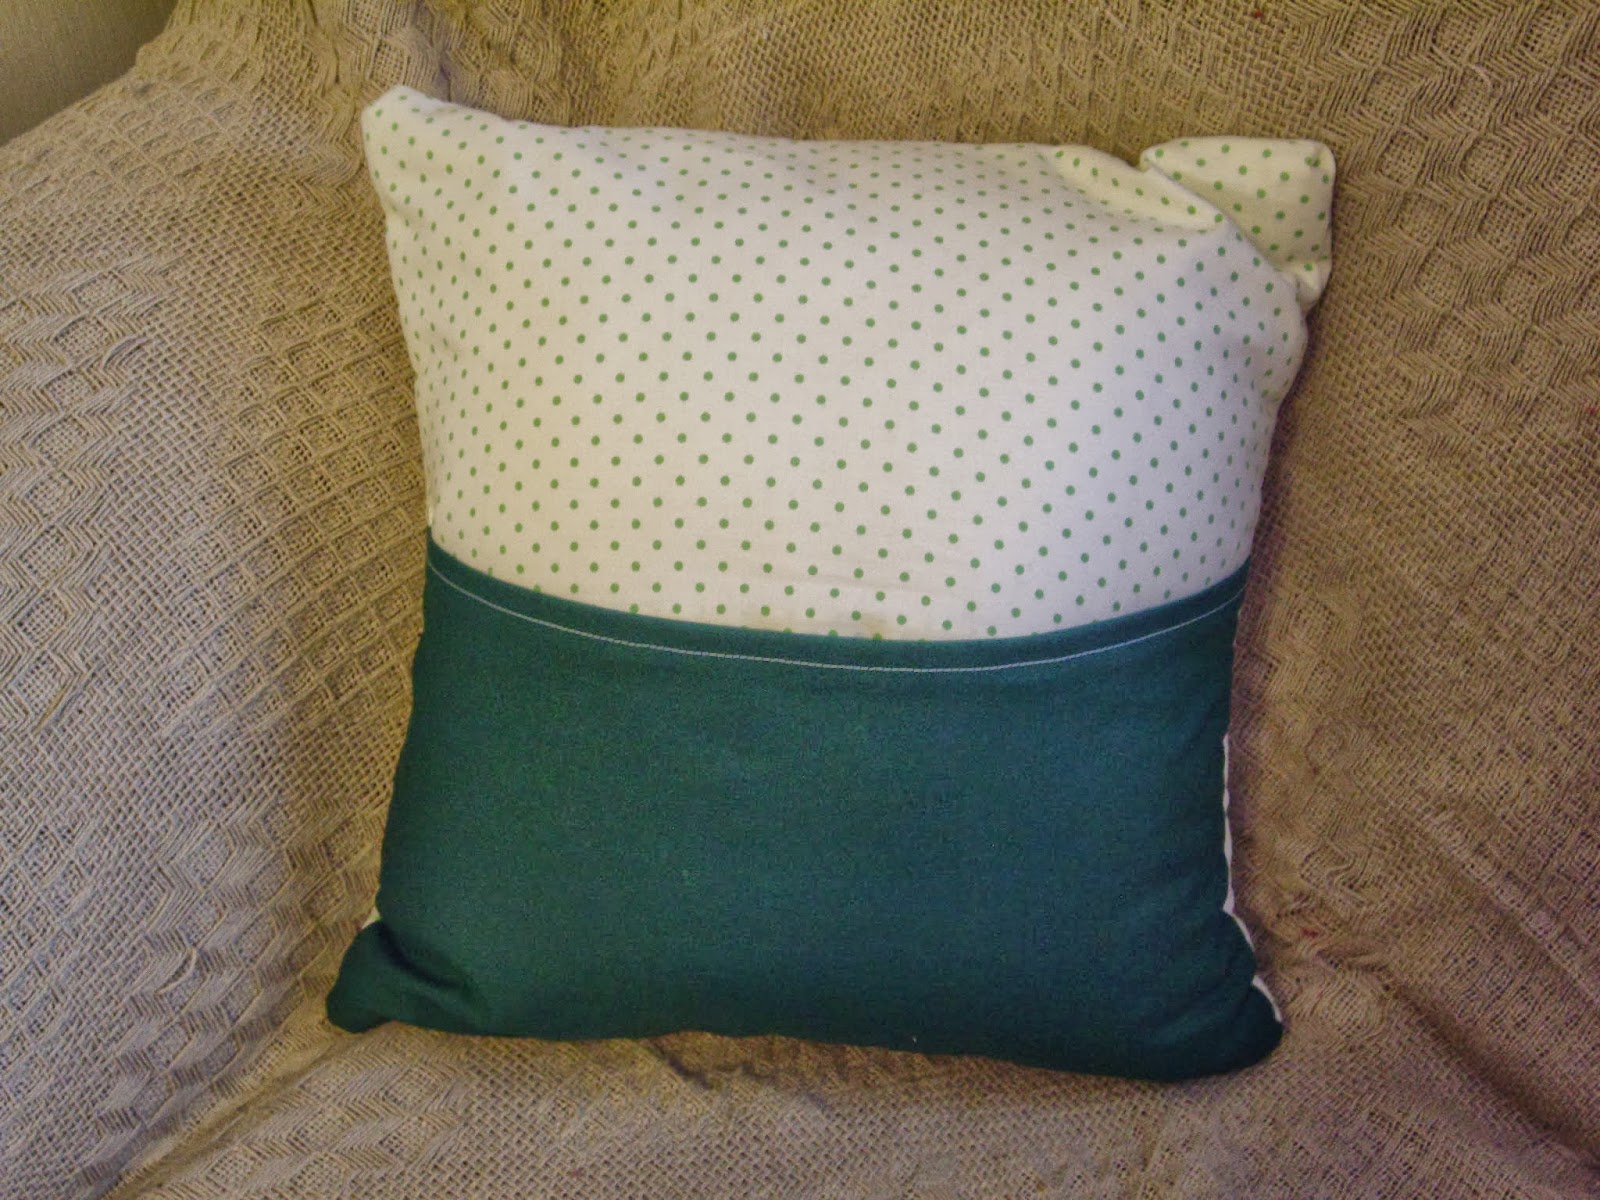
An envelope back was the perfect thing to be doing in the hour long session we had.  Obviously, I started off my cushion making with a zip cushion (for some reason I always pick the hard things first!), but the envelope back is so easy to do and really effective.  Unfortunately I was running out of time in the workshop so under pressure I managed to get the wrong part of my envelope overlapping.  Still, I think it looks lovely and is so much simpler to do than the zip.


Although the hour was pushing things a bit, it was a great chance to have a play with the sewing machine (which was a beautiful Janome - I got sewing machine envy) and it was lovely to have something to take home and show off.  Now that a lot of the work on the house is finished, I'm going to get the spare room cleared and it will look perfect on the bed in there!

Monday, 12 August 2013

LOVE cushion

In case you've been wondering where I've got to...I've been on holiday with my hubby and my folks in the USA :-) !  We had such an amazing time - absolutely loved it!  The three weeks flew by - it's hard to believe we're back to reality already - but I'm happy to be here updating my little blog!

My friend and her boyfriend got engaged back in Northern Ireland at Easter time, and I was pondering what to get them as an engagement present.  A bit mortified because it had taken me so long to get something sorted, I decided that it would be nice to make them something, rather than just buy a gift - that, as well as the few hundred miles of distance between us, might excuse the lateness...!

So may I present my first ever cushion...

LOVE cushion

I went down to Fabric Land here in Bristol to buy fabric, and got a gorgeous cream crepe - I asked the girl serving whether she thought it would be good for cushion, and her only comment was 'Well...it's cream"!  So that was a yes, and I'm trusting that the colour of the fabric isn't too challenging for them!  I also had some of the fabric left from which I made my bunting back in May - I thought it would be ideal for my letters.

There were a few great challenges for me with my first cushion

1. Letters 

This was something a wee bit different - cutting out letters from fabric and then sewing them onto the cushion.  I used a zigzag stitch on my machine to go round the edge of each letter, and this worked really well - it was a cute little effect, and also stopped the edges from fraying.

Template letters
Cut out letters


"L" with a zig-zag stitch around the edges

2. Putting in a zipper

Zippers continue to be a challenge!  

Please, please, please, when you're making a cushion, don't do what I did.  I got so carried away with all my cutting out of letters and all sorts that before I even thought about it, I'd sewn up the other sides of the cushion, and left the zipper til last!  Disaster - as all good sewists know, you should put your zipper in as early as possible.  This understandably led to a bit of complexity!


Ideally I would have used a 14" zip, but because I had already sewn everything together, I ended up using a 12", as there just wasn't enough space to fit the longer length in at the corners of my material.  One of these days I will definitely install the zip at the right time - I continue to live in hope!  However, in the end it looked fine - more coincidence than my skills, I can assure you!


Popped my little label on the back of the cushion - at least this shows that it's handmade, so hopefully that adds charm to the little flaw underneath, haha!  The little lip around the zip hides the zip nicely, which I think is a nice little effect as well.


For a first attempt at a cushion, I'm really pleased - and the bride-to-be was as well, which is really the most important thing!  What a relief!